
Effective bathroom ventilation is essential for a healthy, mold-free space. Without proper airflow, moisture accumulates, leading to mold, odors, and peeling paint. A proper system helps keep your bathroom fresh while preventing long-term damage.
This guide will cover everything you need to know about bathroom vent installation, including preparation, steps for installing the system, drainage repair services, and the role of professionals. By the end, you’ll clearly understand how to install bathroom ventilation properly.
Understanding Bathroom Ventilation Systems
A bathroom ventilation system removes excess moisture and odors by pulling air through a fan and expelling it outside. Choosing the right fan size and type is crucial for efficiency. Proper vent installation ensures that humid air doesn’t linger, reducing the risk of damage and mold growth.
Step-by-Step Guide to Installing a Bathroom Ventilation System
Prepare for Installation
Before installing a bathroom fan, gather tools such as a drill, vent duct, and wiring kit. Identify a spot for the fan, ideally near the shower. Check whether existing wiring supports the fan or plans for new electrical connections.
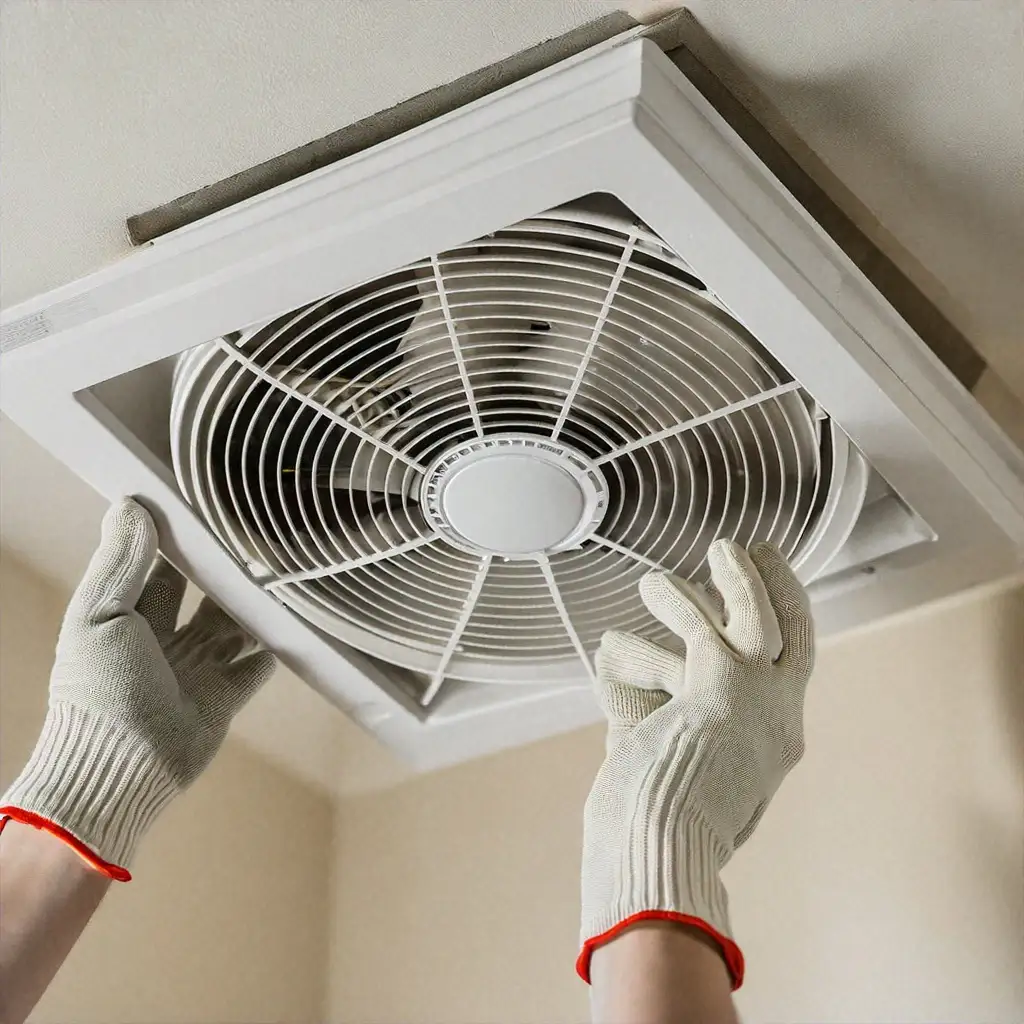
Cut the Ceiling Opening
Measure and mark the fan’s dimensions on the ceiling. Use a drywall saw to cut the opening. The fan should fit snugly into this space. Double-check that the duct and fan housing align with external vent openings.
Install Ductwork
Connect flexible ductwork to the fan’s outlet. Secure the duct with metal clamps to prevent air loss. Route the duct through the ceiling to an exterior vent. This step ensures that vented air exits your home.
Attach the Exhaust Fan
Place the fan housing into the ceiling opening. Screw it firmly into the joists for stability. Ensure alignment with the ductwork and double-check it’s secure before moving forward.
Wire the Fan Safely
Follow instructions for wiring a bathroom vent fan. Connect the fan’s wiring according to its color-coded guide. Secure electrical connections with wire nuts and tuck wires neatly into the housing before attaching the cover plate.
Test the System
Turn on the fan to confirm it’s working. Check the airflow at the exterior vent to ensure it pulls moisture effectively. This final test verifies a successful ventilation installation.
Ventilation Done Right: Why Expertise Matters
Ventilation projects look simple, but they’re more complex than they seem. Installing ductwork, handling electrical connections, and ensuring code compliance requires expertise. Mistakes can result in inefficiency, leaks, or safety hazards.
Working with professionals ensures smooth installation. Experts know how to install effective and reliable bathroom ventilation, just as they provide quality irrigation maintenance for outdoor systems. Their guidance guarantees high-quality results for complicated setups, like installing a vent in the bathroom.
The Right Fit: Custom Ventilation for Your Space
At Righty Tighty Plumbing, we craft solutions that solve moisture issues and prevent mold. We understand bathroom vent installation inside and out and designing systems that fit your needs. Whether you’re curious about the future of plumbing or need bathroom plumbing services, we’re here to help.
We also offer emergency repairs, leak detection, and plumbing upgrades. We cover everything from addressing kitchen sink issues to maintaining commercial drain maintenance. Our commitment to quality ensures long-lasting results, keeping your home safe and efficient.
